Three-Dimensional Hand Drawing
There is a current fascination with three-dimensional (3-D) films and visual creations. This project creates a 3-D effect with simple pencil and paper. It is one of the easiest yet most effective crafts.
Materials:
- A sheet of A4 paper (white works best)
- A pencil
- Coloured markers or crayons
Instructions:
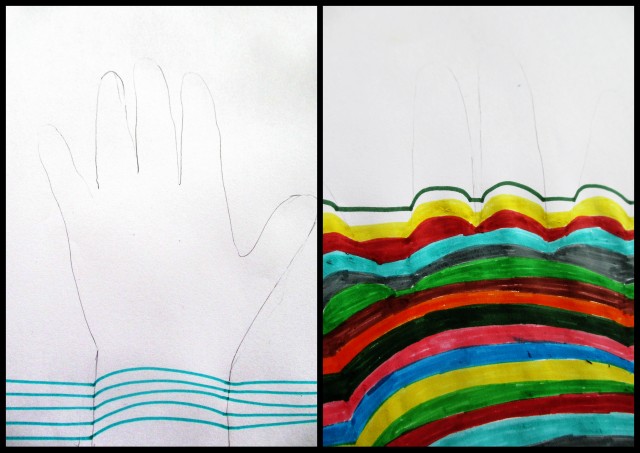
1. Draw around your hand very lightly using the pencil.
2. Starting at one side of the paper, use a marker to draw a straight line until you reach the arm. Without lifting the pen, make a curved line from one side of the arm to the other; then continue with a straight line.
3. If you want to colour between the lines it is best to do this as you go. Place a tissue under your hand as you colour so you don’t smudge the finished lines.
4. Continue to make lines all the way up the page. A straight line, then curved and back to straight. Take special care once you reach the fingers, as you need a curved line over each finger.
5. As you approach and reach the top of the page your lines should be completely straight.
This looks great as just single lines or coloured in as in the photographs. You can also try the same technique on shapes, letters, picture outlines etc. Just remember to start with a straight line and alternate curved and straight.
By Karen Clayton


I will try this with my kids. I think it’ll be good for kids who are primary-aged.
I’d actually like to try it myself! Such a simple concept and a great result.