Easter Bunny Box
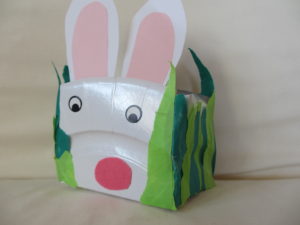 I had an idea for a “bunny box” but was having difficulty finding a way to make a box which was easy to make and reasonably strong. I came across this design that uses a paper plate (yes, a round one) and transforms it into a box. I was even happier to find a video showing exactly how to do it, as I couldn’t visualise how to get from a plate to a box.
This box can easily be used for all occasions by varying the decoration.
Materials:
- large paper plate (both COOP and Migros have packs of 20 for around SFr. 4)
- scissors
- a ruler
- black pen
- glue
- paper (white and pink)
- googly eyes or white stickers to make eyes
- green tissue paper (a mix of dark and light works well)
- stapler
Instructions:
1. Turn your paper plate over and draw two lines going right across the plate. The space between the lines will be the width of your box.
2. Draw two more lines going the other way; you will have either a square or rectangle in the middle and this will be the base of your box.
3. Cut each alternative line around the outside of the plate and fold up the corner. Your pen lines should be on the inside.
4. Now simply fold your box together and staple each corner.
You can see a fantastic video on how to make the box here. You will notice on the video that the lady trims the plate first to make the top of the box flatter. I chose not to do that, as I wanted the rounded effect for a rabbit.
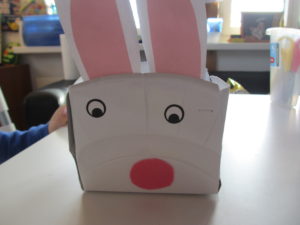
5. Cut two bunny ears from the white paper and smaller versions from the pink. Stick them together and attach to one edge of your box.
6.Stick on the eyes and cut and glue on a nose from pink paper (or pink felt).
7. Tear strips from the green tissue paper and use these to decorate around the box so your bunny is peeping out of the grass. These grass strips can be used to cover the joins at the corner of the box and the staples.
8. Fill your box with Easter treats.
By Karen Clayton


This is a very cute craft activity which I’ll make with my daughter. Thanks!