Little Star: A Christmas Decoration
Here is a simple and fun project that you can easily personalize and get creative with your kids.
Materials
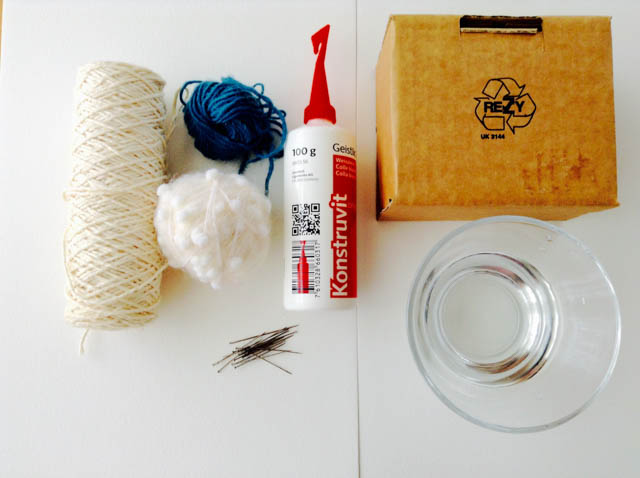
- Cotton cord/string in different colours (a thinner one works better than a thick one)
- Liquid white glue
- Some water in a small receptacle
- Some cardboard (a box, or just a piece of one). Plastic takeaway containers work even better, so use one of those if you have one.
- Some pins
- Ribbon, glitter, beads and everything else you would like to accessorize with.

Instructions
First, you will need to create the shape of the star on your cardboard by placing a pin in all the places where two of the star’s lines meet. If it helps, you can trace it using a crayon first (even better, let your child create his own shape).

Put a generous amount of glue in the water and mix it with a pencil (better not to use your hands for this) until the glue is incorporated. Cut a piece of string and place into the mixture. Using the pencil, make sure it’s fully immersed in the liquid and leave it for at least 10 minutes.
Take the thread out and drain the extra water (you can use a glove for this; otherwise, just rinse your hands with some water afterwards) and start shaping the little star. Leave the ends loose, so you can make a little knot, once it’s dry.
Leave it for a couple of hours, or overnight, to completely dry. Make a knot at the end and decorate your star. You can glue on glitter, beads, buttons, ribbon and so on. Have fun and Happy Christmas!
Tip: You can easily play with the forms and make Christmas trees, little houses or just random shapes. You can make sets of two or three of these and place them in a little box – they make a lovely handmade gift.
Text and photos by Laura Munteanu
Laura studied journalism and advertising and has worked as a journalist and an illustrator. She has illustrated for magazines, websites, charity, and diverse campaigns. She lives in Zurich with her husband and seven-year-old daughter.


